Cooking with Facts
Stuffed awesomeness, similar to the famous brand.
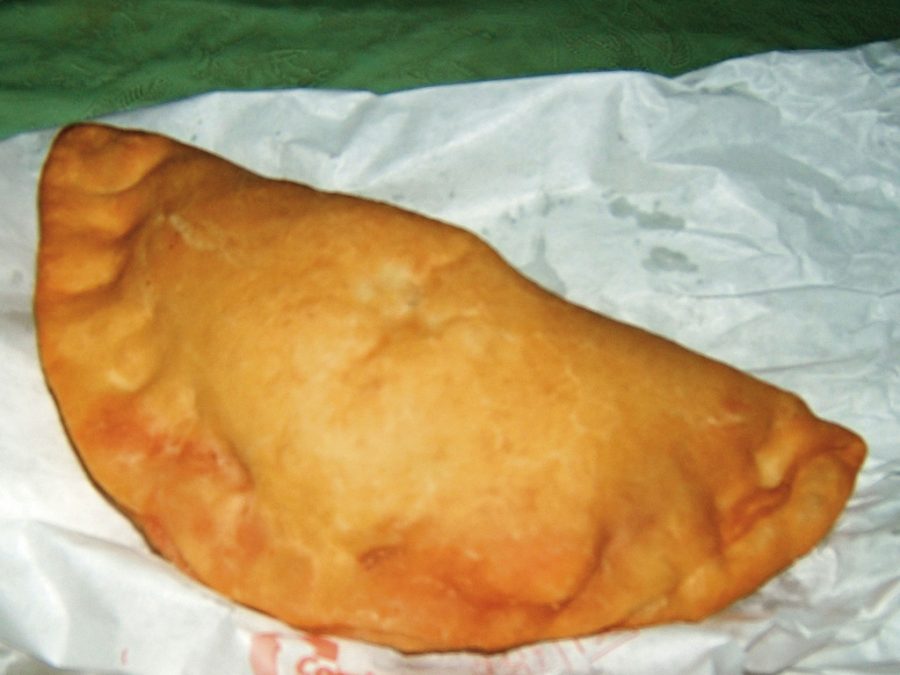
Homemade Hot Pockets
When I was younger, and my siblings and I relied on my father’s baking skills- which he had very little of, might I add- to ‘survive,’ a common item that stocked our freezers were the incredibly easy to make Hot Pockets.
All we kids had to do was take them out of the wrapper, slide them into the slipcase already provided, and toss them into the microwave for two to three minutes. It saved us a lot of hassle seeing as it prevented us from having to eat sloppy bologna sandwiches and overdone toast.
Now, in my father’s defense, there were five of us… so, I must give him some credit since he was not- and still isn’t- the ‘baking type.’
But, after my rebellious phase, I strived to find a recipe to match up to that of the Hot Pockets of my childhood. A home-made, more versatile contender.
I suppose you could say: objective achieved.
With a formula found at this site; http://sallysbakingaddiction.com/2016/03/25/homemade-ham-cheese-pockets/ I acquired the skill to make homemade ham and cheese pockets, with which you can adjust the items inside to suit one’s personal preferences and tastes.
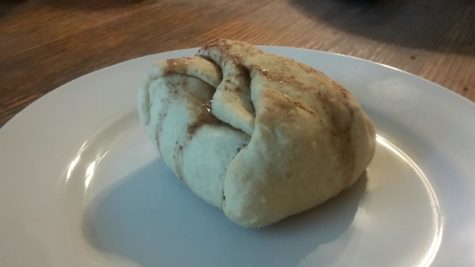
For example, when I made them- due to my family’s extreme difference in taste buds as it seems- I was required to make five different types, including (and with all having cheese); pepperoni, Philly steak and turkey.
Overall, my family and I gave this recipe a nine out of ten- losing one point only because of my negligence to use the cornflower, as Sally stated, in the first batch I made. These are extremely simple to bake and can be quite fun to prank people with by filling one with the most random ingredients known to mankind (though, it is not the most fun when you are on the receiving end of one).
Sweet and simply put, enjoy.
Recipe for Homemade Ham and Cheese Pockets (by Sally at http://sallysbakingaddiction.com/2016/03/25/homemade-ham-cheese-pockets/)-
Ingredients:
- 2 and 1/4 teaspoons Red Star Platinum yeast (1 standard packet)
- 1 and 1/3 cups (320ml) warm water, about 110°F (43°C)
- 3 and 1/2 cups (440g) all-purpose flour, plus more for work surface
- 1 Tablespoon (13g) granulated sugar
- 2 Tablespoons (30ml) olive oil
- 3/4 teaspoon salt
- egg wash: 1 large egg beaten with 1 Tablespoon milk
Filling
- 8 slices cheese or 2 cups shredded (I use sharp cheddar)
- 16 thin slices deli ham or 2 cups cubed ham
Directions:
- In a large mixing bowl or the bowl of your stand mixer fitted with a hook attachment, combine the yeast and warm water. Stir it around and let sit for 5 minutes until the mixture is foamy. If the yeast doesn’t dissolve or foam, your yeast is dead. Start again with active yeast. Add flour, sugar, olive oil, and salt. Mix by hand or with the dough hook on low speed for 1 minute. Once all of the ingredients are mixed, slowly knead for 7 minutes by hand or with your dough hook on low-medium speed. If your dough is too wet, add up to 1/4 cup more flour. After kneading, your dough should be smooth and elastic. Poke it with your finger – if it slowly bounces back, your dough is ready to rise. If not, keep kneading.
- Shape the dough into a ball and place in a large mixing bowl that has been greased lightly with olive oil. Turn it over to coat all sides. Cover tightly with plastic wrap and allow to rise in a warm environment (about 75°F or 80°F/24°C or 27°C)1 for 1 hour or until doubled in size.
- Preheat oven to 400°F (204°C). Line 2 large baking sheets with parchment paper or silicone baking mats.
- Once risen, punch the dough down to release the air. Turn the dough out onto a lightly floured surface. Using a sharp knife, slice dough in half. Then slice each half into quarters. You’ll have 8 pieces of dough, as shown in the photo above. Flatten each piece with your fingers or use a rolling pin. You want each piece of flattened dough to be about 6 inches long and 4 inches wide. They don’t have to be perfect rectangles, as you can see in my photos! Transfer flattened dough to the baking sheets. Place the cheese (I fold the slice in half) and ham (2 slices for each) on top of the dough on one side, then fold the other side over top. Pinch the edges to seal as best you can. Use a fork to crimp the edges. Brush the tops and sides of each pocket with egg wash, then slice 2-3 slits in the tops for air vents (use a super sharp knife to do that).
- Bake the pockets for 20-25 minutes, or until the tops are golden brown. Make sure to rotate the baking sheet once or twice during bake time. Remove pockets from the oven and allow to cool on the pan until ready to handle and serve.
Make ahead tip: The pockets can be made through step 4 then covered and refrigerated for up to 1 day. Then bake as directed. You can also freeze the baked pockets, which is what I do. After the pockets cool, wrap them individually in aluminum foil and freeze. Then microwave for 2-3 minutes on high or bake at 350°F (177°C) for 20 minutes. No need to thaw.
Aurora Soural is currently a ninth grade student at the Altoona Area Junior High School. Aurora's hobbies include reading, writing, drawing and cooking.


Gianna Ciavarella • Dec 16, 2016 at 2:12 pm
The lasagna looks crisp.