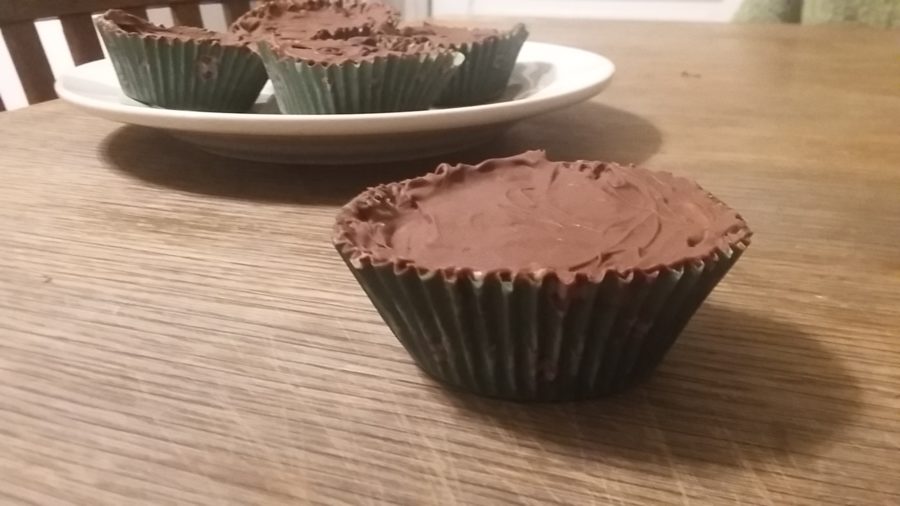
Cooking with Facts: Reese’s Cups
~a blog for those who want the info., the ingredients, and an ideal run-down~
When I was much younger, an anklebiter at best, my fondness for Reese’s cups during the holiday months was uncanny. Sneaking handfuls of the small, individually wrapped bites of peanut buttery, chocolaty goodness was a piece of cake for me then; something I looked forward to even in an ‘I’m going to grow up to be a ninja’ sort of way. I will admit, it has gotten a bit harder to do over the years…
Which is why, for this week, I chose to do home-made Reese’s cups in hopes of preparing for the soon to come Easter this Sunday, as well as to satisfy intense candy-stealing urges.
Now, I got the recipe for these treats from a particularly interesting website by the name of topsecretrecipes.com; a site that unlocks the secrets to making some of our favorite brand-name foods in a way unlike any other, using household ingredients in comparison to miscellaneous chemicals at that.
Not only was making the knock-off cups easy, but it was also affordable for the average American to conjure up if they needed to get some extra ingredients (for example, if you were on a last minute run for milk chocolate chips, they’d only cost you two to three dollars). Along with its overall beginning-chef level of difficulty and affordability; the Reese’s cups that I made actually had a very similar taste to the real deal… something I severely had not been expecting from four measly ingredients. Giving this recipe a try is in anyone’s best interest if he or she has a fond love for Reese’s cups as well, and I do believe that even if you are not quite a lover of the cups they would make a nice gift for a teacher or parent.
Recipe (Reese’s Cups):
Ingredients:
- 12 paper muffin cups
- One 12 oz. pkg. Milk chocolate chips
- 1 cup reduced-fat peanut butter
- ½ cup powdered sugar
- ¼ teaspoon salt
Directions: (makes 12 cups)
- Cut the top half off the muffin cups so they are shallower
- Pour the chocolate chips into a glass bowl and microwave while stirring in between minutes until fully melted
- Using a teaspoon, spoon a portion of the melted chocolate into the middle of a muffin cup. Draw the chocolate up the edges of the cup using the back of the spoon- coating the entire inside and placing it into a muffin tin once finished (do this with all cups, then place tin into the fridge so the chocolate may harden)
- Combine peanut butter, salt, and powdered sugar in medium-sized bowl.
- When the chocolate cups in the muffin tin have hardened, place the now sweetened peanut butter mixture in the microwave for about 1 minute (this is to soften it as well as make it easier to pour in the cups)
- Spoon a small portion of peanut butter into each of the chocolate-coated cups. Leave enough space at the top for the additional layer of chocolate that will be added later on. Put cups back in fridge for about ten minutes, then pull them out and smoothen the peanut butter out on the tops. Pop the cups back into the fridge for about an hour, or until the peanut butter has hardened
- Remelt the leftover chocolate chips in the microwave. Removing the cups, spread and flatten a layer of melted chocolate on each of them with a spoon. Chill once again in the fridge until hard
- Enjoy- do not forget the candy-wrapper around the cup is not edible
Aurora Soural is currently a ninth grade student at the Altoona Area Junior High School. Aurora's hobbies include reading, writing, drawing and cooking.